Overview
The Brooktrout® SR140 is a software-only Fax over IP (FoIP) solution from Dialogic Technology.
This article serves as a guide for configuring a T38Fax.com SIP trunk for use with the Dialogic® Brooktrout® SR140 FoIP software platform.
Process
- Go to the Brooktrout® Configuration tool on your computer. From Programs > GFI FaxMaker Brooktrout TR1034 Drivers > Brooktrout Configuration Tool.
- By default, the tool exists in this location
C:\Program Files (x86)\Brooktrout\bin\configtool - Open the Brooktrout Configuration Tool wizard, right-click and run it as an administrator.
- When the wizard appears, click Advanced Mode from the bottom left corner.
- In Advanced Mode, select the SIP node under IP Call Control Modules.
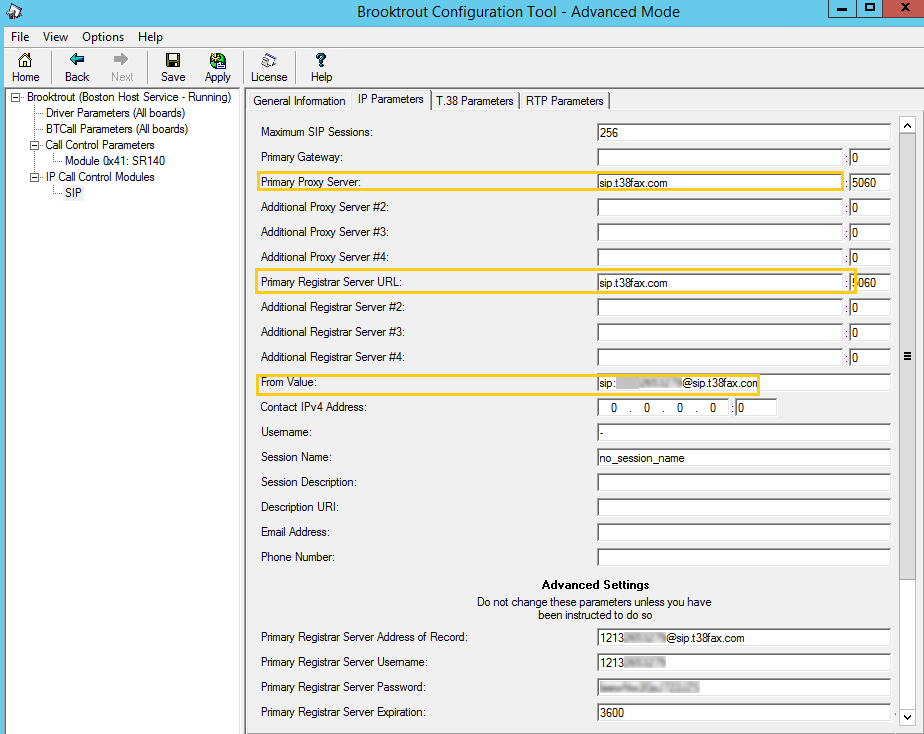
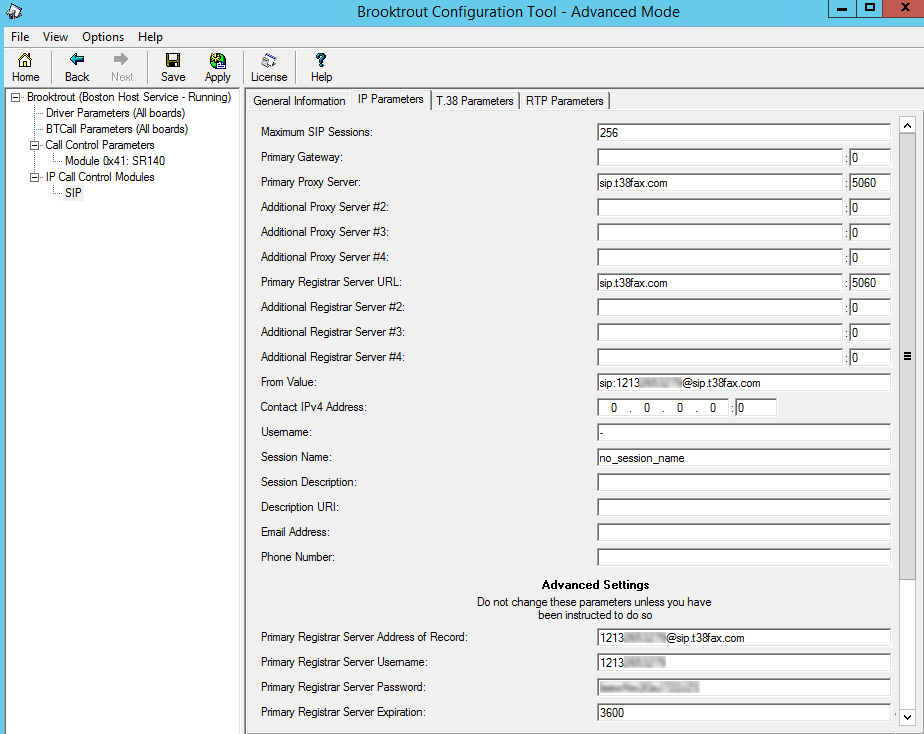
- Navigate to the IP Parameters tab in the right pane.
- Input the following values in the fields below:
- Primary Proxy Server:
sip.t38fax.com - Primary Registrar Server URL:
sip.t38fax.com - From Value: sip:
YOUR_DID@sip.t38fax.com
- Primary Proxy Server:
- Substitute YOUR_DID with your T38Fax.com DID.
- Click Show Advanced.
- In the Advanced Settings section, input the values below:
- Primary Registrar Server Address of Record:
YOUR_DID@sip.t38fax.com - Primary Registrar Server Username: YOUR_DID
- Primary Registrar Server Password: PASSWORD
- Primary Registrar Server Address of Record:
- Substitute YOUR_DID and PASSWORD with your T38Fax.com SIP Credentials.
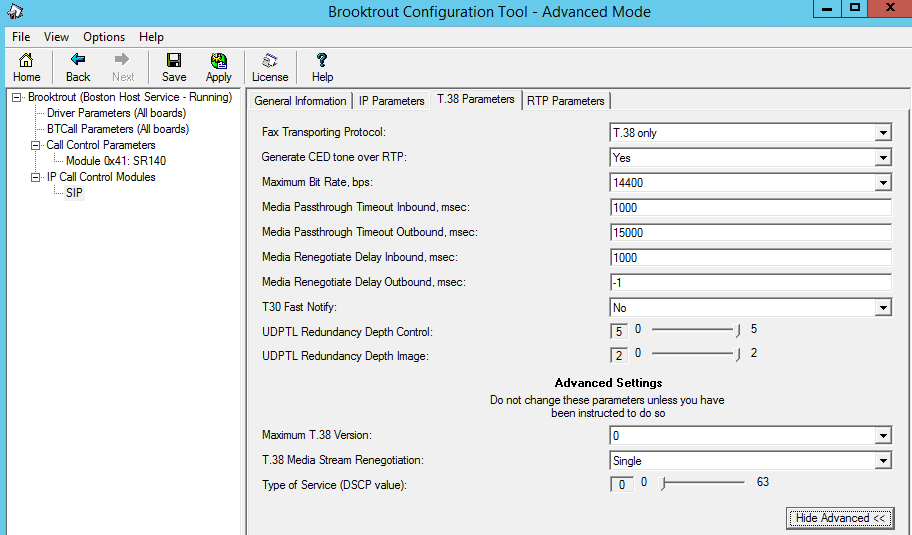
- Navigate to the T.38 Parameters tab in the right pane and set the following:
- Fax Transporting Protocol: T.38 only
- Maximum Bit Rate: 14400
- Media Passthrough Timeout Inbound:
1000 - Media Passthrough Timeout Outbound:
15000 - Media Renegotiate Delay Inbound:
1000 - Media Renegotiate Delay Outbound:
-1 - T30 Fast Notify: No
- UDPTL Redundancy Depth Control: 5
- UDPTL Redundancy Depth Image: 2
- Exit the Brooktrout Configuration Tool to save your changes.
Confirmation
After successfully configuring the Dialogic SR140, check if it is ready to work with your FaxMaker. Test with your usual fax sending method to ensure the correct operation.
It may also be necessary to adjust the outbound CLIP Value. For more information, read the article on Customizing the Caller ID and TSID of Outbound Faxes.
Priyanka Bhotika
Comments