Overview
The Kerio IMAP Migration Tool (KIMT) is a free application for migrating user accounts, email messages, and folders from your IMAP server to Kerio Connect. This article covers the migration process.
Information
Preparing for the Migration
The duration of the migration depends on many factors and may take some time. If possible, the migration should be performed during light usage hours. The migration tool does not overwrite or remove the existing data in the destination Kerio Connect mailboxes. You can, therefore, run the migration tool on active Kerio Connect mailboxes, and the data will be merged.
Make sure that the data on the source IMAP server does not change during or after the migration process. To prevent this from happening, it is vital that users and new emails are directed to the Kerio Connect server before starting the migration.
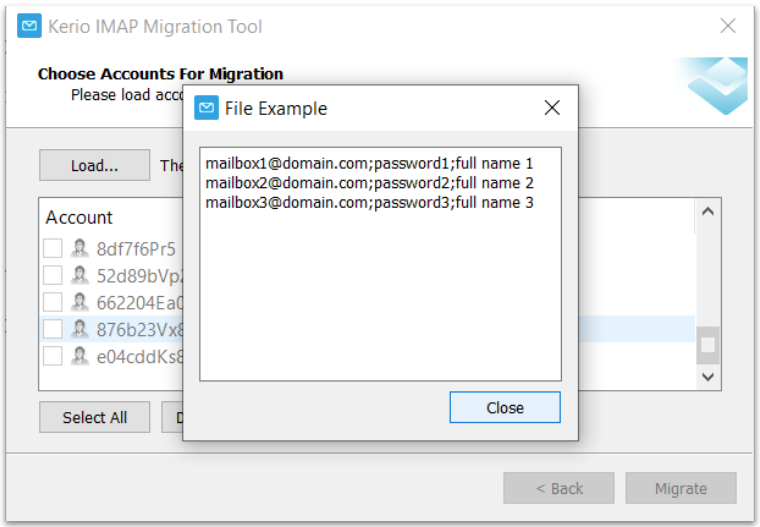
CSV File with User Accounts
Before the migration, it is essential to prepare a CSV file with the list of users and their passwords. This information is crucial for access to the source IMAP server.
The CSV file must follow the pattern: user@domain.com;password;Full Name.
Public and Archive Folders
Public and Archive Folders cannot be migrated using the standard procedure. If you need to migrate these folders, move them to the mailbox of any user to migrate them as private folders.
Process
Before You Begin
- Install and run Kerio Connect. Follow the installation process for Windows, Mac OS X, Linux DEB, and Linux RPM.
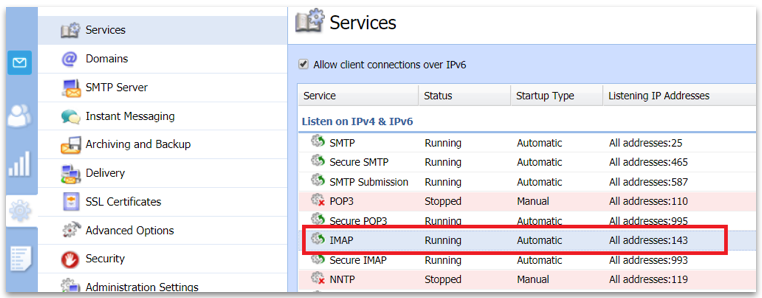
- Confirm that the IMAP Service in Kerio Connect runs on port
143.
- On a machine that can access both Kerio Connect and the source IMAP server, download and install the KIMT tool.
- Check and make sure that the source IMAP server cannot accept new emails. Otherwise, migrated data will be inconsistent.
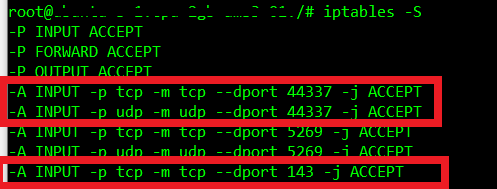
- If the connection between the IMAP server and Kerio Connect goes through a firewall, open the following firewall ports:
-
TCP protocol on port
143 - TCP/UDP protocol on port
44337
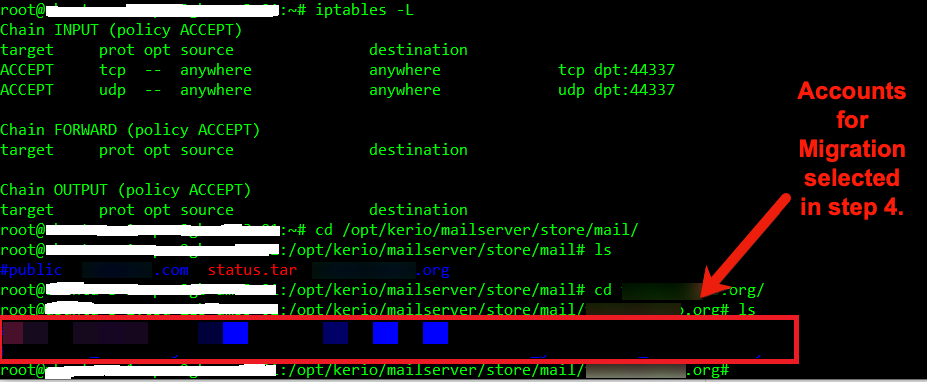
For Linux servers, you can use the iptables tool and create those rules.
-
Migrating the Data
The migration requires that both the source IMAP server and Kerio Connect are running.
- Run the KIMT and follow the wizard.
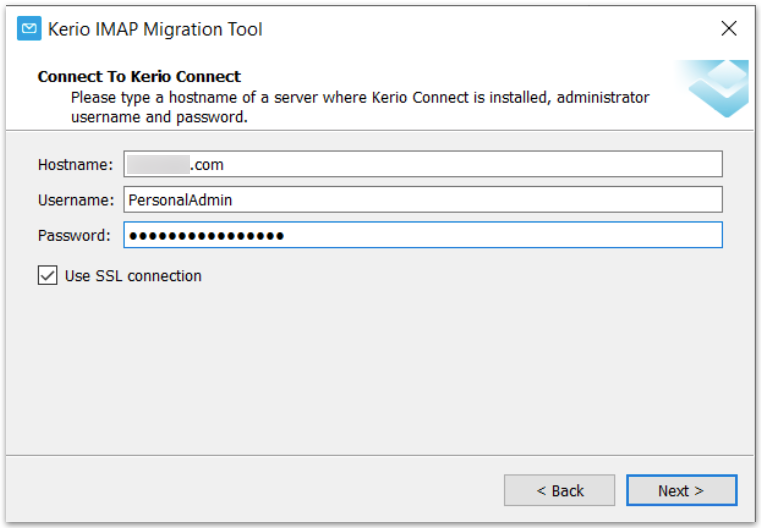
- Enter the Hostname for the source IMAP server. It is recommended to use SSL connection for security reasons.
- Enter the Hostname and Admin credentials for Kerio Connect.
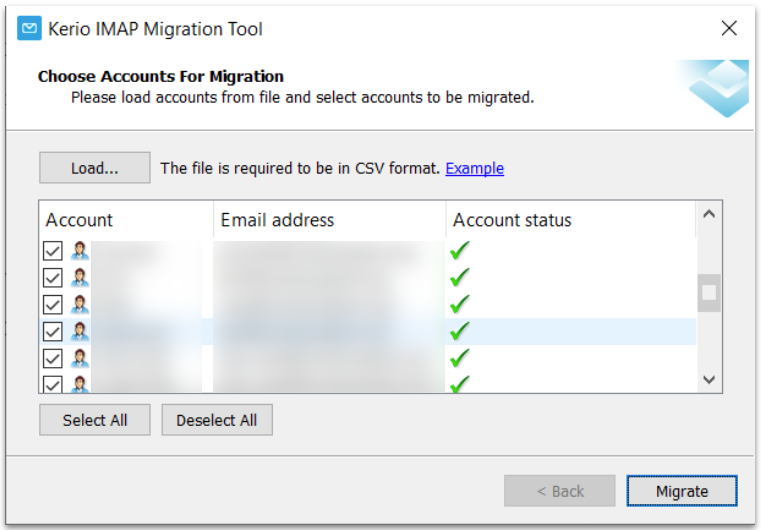
- In the Choose Accounts For Migration option, upload the CSV file and check the users to migrate. The migration process may be time-consuming. It is recommended to migrate the data in parts (groups of users).
- Click Migrate.
Note: If you interrupt the migration process, the tool only saves the completely migrated data of the user being migrated. Before resuming, delete the partially migrated user in Kerio Connect to prevent data duplication. Refer to the Migration Process Logs section of this article for details.
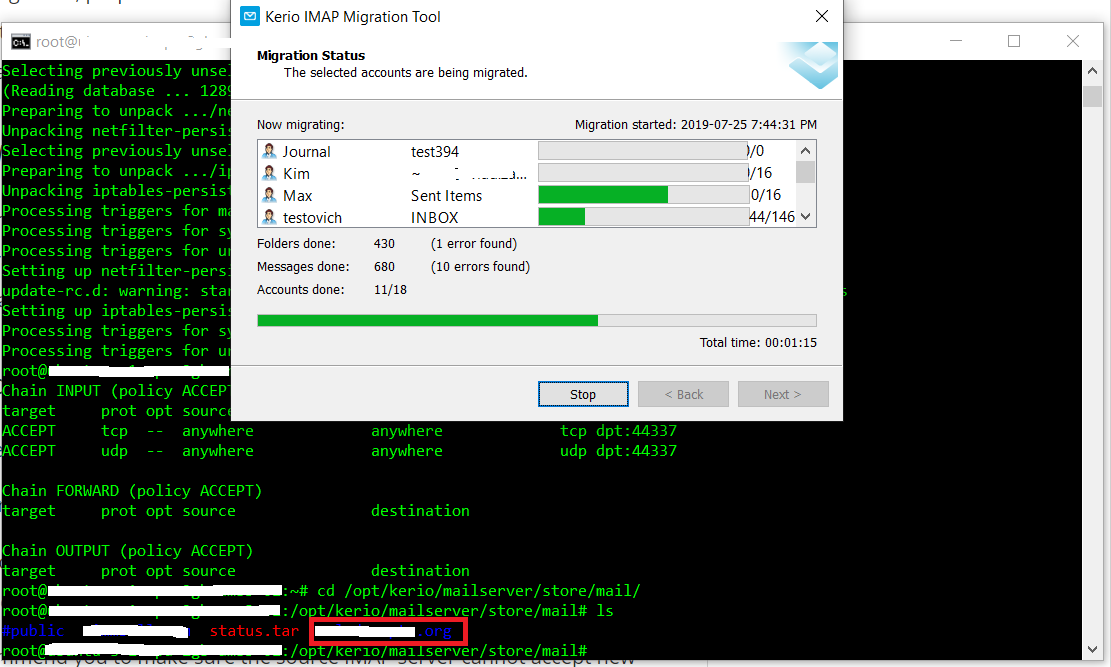
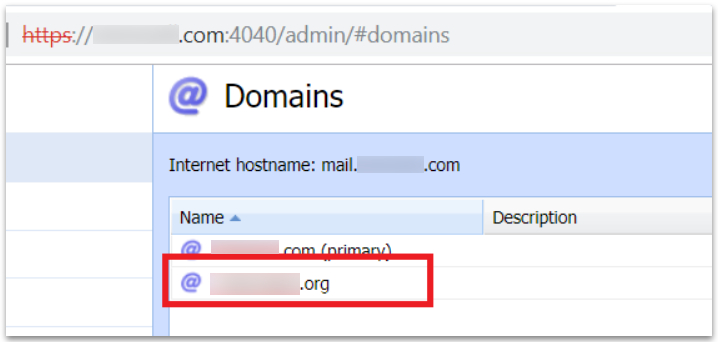
On the destination server, the domain and user folders are created during the migration process.
The migrated domain is also shown in the destination Kerio Connect server through WebAdmin.
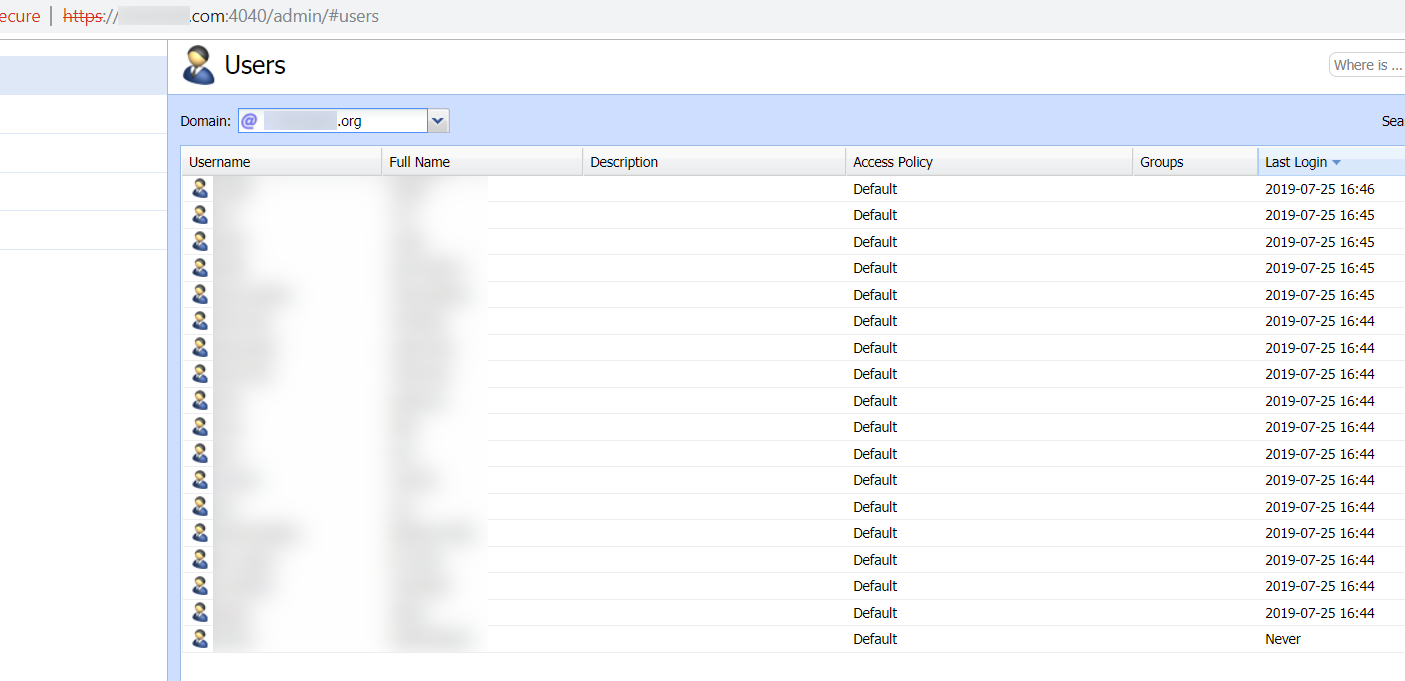
The list of users can be found under Accounts > Users.
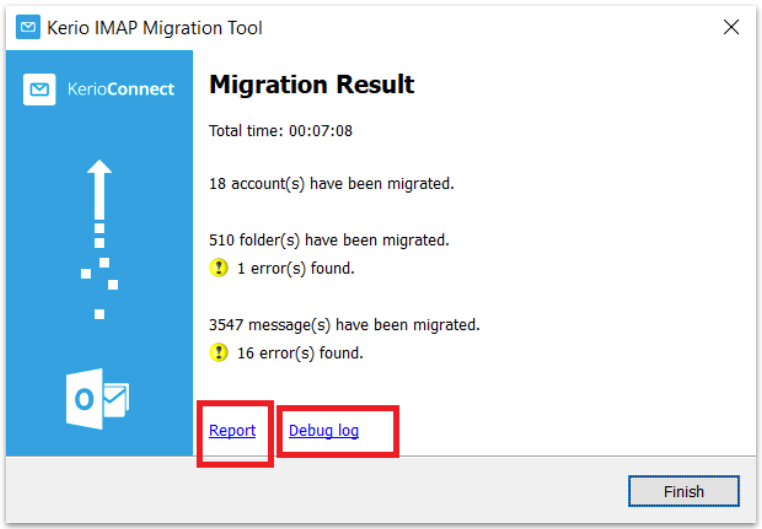
- When the migration is finished, click the Report or Debug log links to see the migration result.
Note: Once the migration is completed, it is recommended to create new accounts/profiles in the users' email clients; this helps avoid inconsistent data.

Confirmation
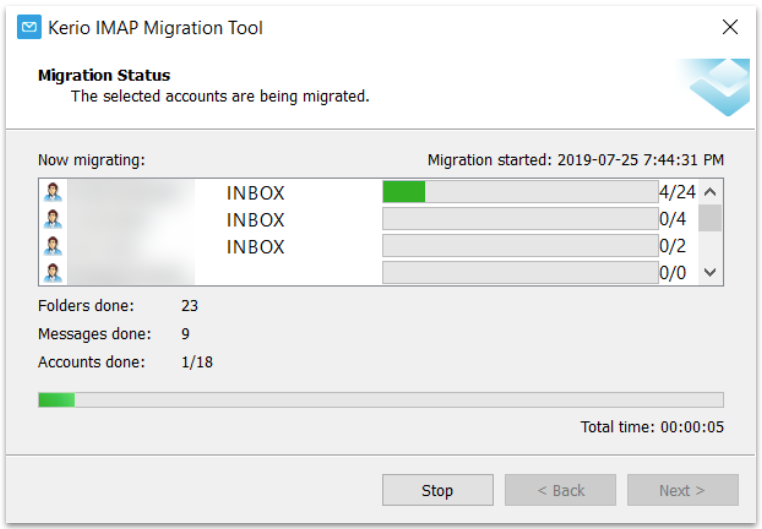
The Migration Result screen shows the total time, users, folders, and messages migrated. Use this information to confirm that the number of objects migrated is correct.
Migration Process Logs
Kerio IMAP Migration Tool generates various logs addressing the migration process. They are stored in the following locations:
- MS Windows:
%TEMP%\KimtLogs\MMDDYYYY_HHMMSS - Linux:
~/KimtLogs/MMDDYYYY_HHMMSS - Mac OS X:
~/Library/Logs/KimtLogs/MMDDYYYY_HHMMSS
Every time you start the migration tool, it generates a new log.
| Log File | Description |
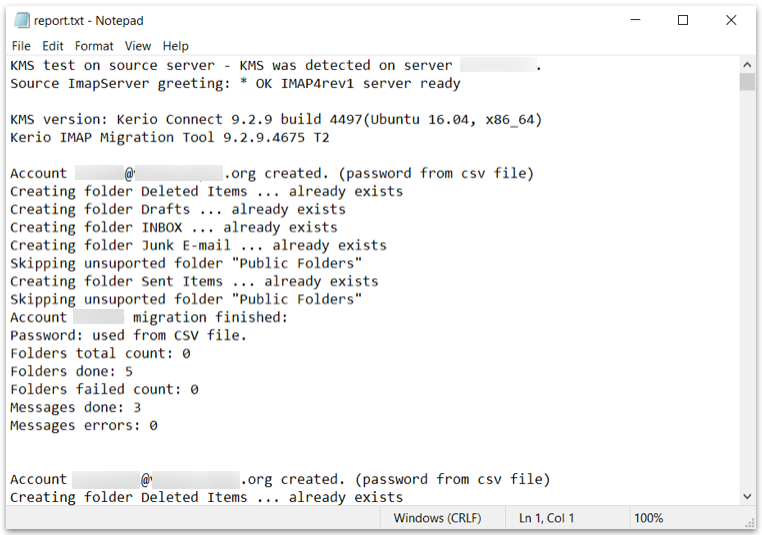
| Report Log |
After completion of each migration, it is recommended to go through this file to make sure that no errors occurred and that all user accounts have been migrated correctly. If users had not been mapped to Kerio Connect before the migration, the Report Log includes new user passwords generated by the migration tool. |
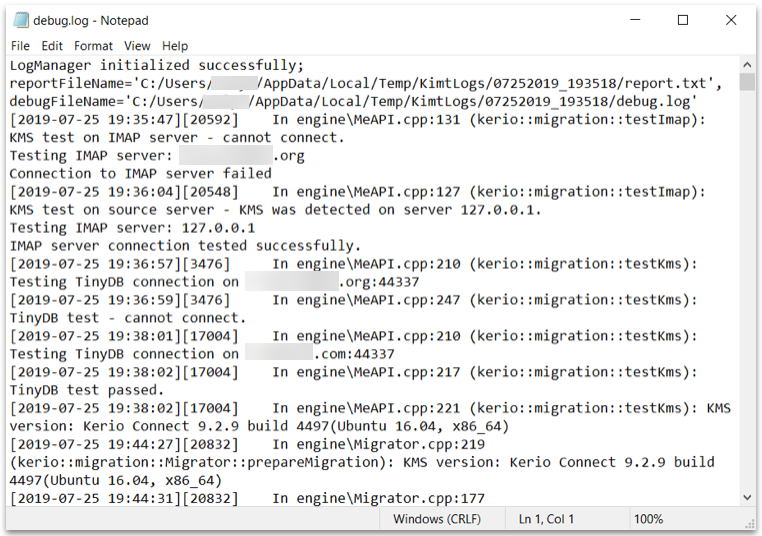
| Debug Log |
Information in this log is useful, especially for the developers. If you have any issues during the migration process, this log can help the Kerio technical support to find the solution. |
Examples of Debug and Report Logs
Related Articles
Priyanka Bhotika
Comments