Overview
GFI FaxMaker can be installed in a Lotus Domino/Notes 4/5/6/6.5 environment, either directly on the server or on a separate machine. For larger networks, it is recommended to install GFI FaxMaker on a separate machine than Lotus Notes/Domino.
This article provides the steps to configure Lotus Domino/Notes 6 to send and receive faxes with GFI FaxMaker.
For information regarding how it works, refer to Lotus Domino/Notes Configuration.
Information
This guide refers to GFI FaxMaker working with Lotus Domino/Notes version 6.
Process
The setup process involves five main steps:
- Creating a mailbox database on the Domino server.
- Configuring the Person for the GFI FaxMaker Domino database.
- Give the GFI FaxMaker Person permission on the GFI FaxMaker database.
- Remove the default $POP3 View.
- Add the FAX Foreign Domain.
Step 1: Create a Mailbox Database on the Domino Server
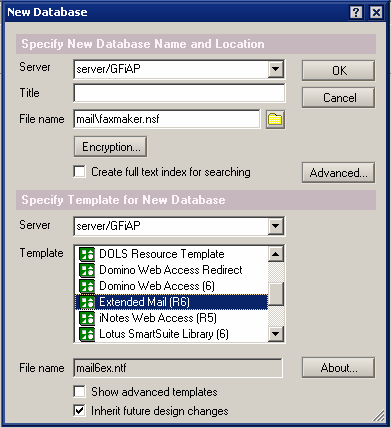
- From the Domino Administrator menu bar, select File > Database > New. The following window is displayed:
Figure 1: Creating a new database
- Select your Domino Server. Choose mail directory and enter
GFIFaxMaker.nsfas the filename. - Click OK to create the database.
Step 2: Configure the Person for the GFI FaxMaker Domino Database
- From Domino Administrator, click Add Person. The following window is displayed:
Figure 2: Add a person
-
Fill in the following fields:
Option Setting First name GFI FaxMakerLast name MailboxUser name GFI FaxMakerShort name/User ID GFIFaxMakerInternet Password Choose a POP3 password Mail System POP or IMAP Mail Server Domino Server name Internet Address The email address which will be able to receive email on the server. Figure 3: Add a person fields
-
Click Save and Close.

Step 3: Give the GFI FaxMaker Person permission on the GFI FaxMaker database
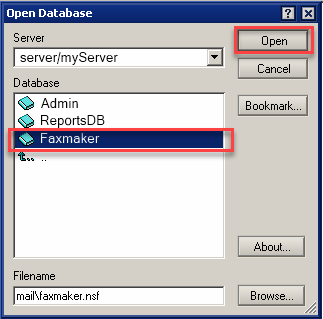
- In the Domino Administrator, select File > Database > Open to open the GFI FaxMaker database.
- Select the server and browse to the GFI FaxMaker database (the database name is Faxmaker in the example screenshot below). Click Open.
Figure 4: Open the GFI FaxMaker database
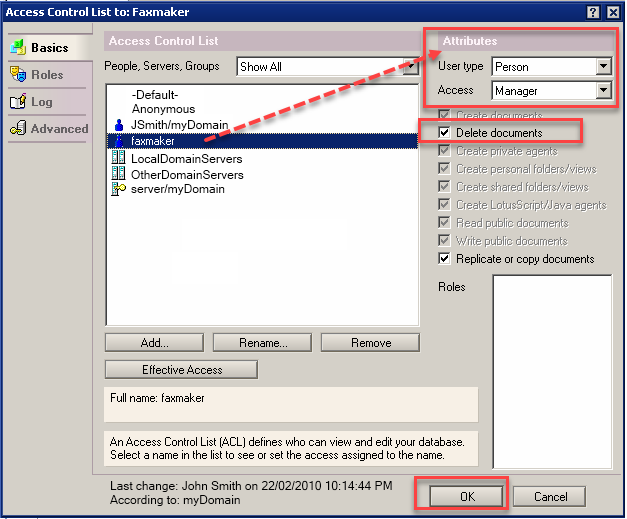
- Navigate to File > Database > Access Control.
- Click Add to add the GFI FaxMaker Person.
- Select the GFI FaxMaker Person and from the Attributes section, select:
- User type: Person
- Access: Manager.
- Select Delete documents.
Figure 5: Configuring permissions
- Click OK.
Step 4: Remove the Default $POP3 View
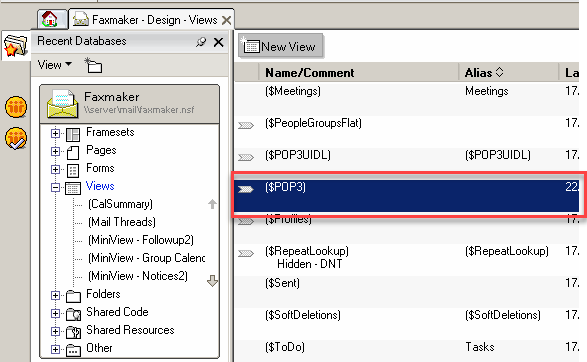
- From Lotus Domino Designer, select File > Database > Open.
- Select your Domino server, the mail directory and GFIFaxMaker.nsf.
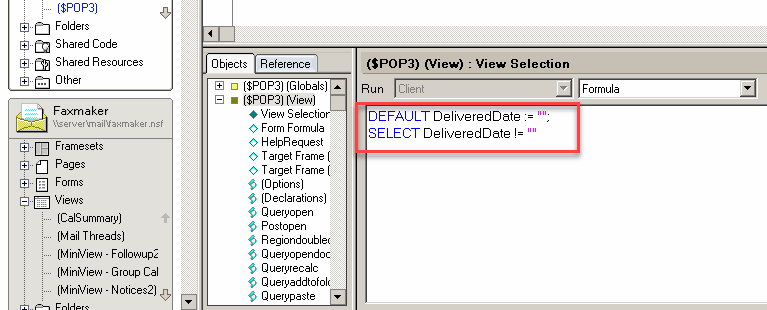
- From the Views node, double-click $POP3.
Figure 6: Removing the default POP3 view
- Click OK to the warning prompt.
- Select the following two lines and delete them from the $POP view object:
DEFAULT DeliveredDate := “”;
SELECT DeliveredDate != “”
Figure 7: Delete lines from the $POP view
- Save and exit the Domino Designer.
Step 5: Add the FAX Foreign Domain
- Load the Domino Administrator.
- Select the Configuration tab and select Messaging\Domains.
- Click Add Domain and select Foreign Domain.
- Enter
faxas the Foreign Domain Name. - Select the Mail Information tab.
- Enter the Domino server name as the Gateway server name.
- Enter
mail\GFI FaxMaker.nsfas the Gateway Mail File Name.
NOTE
When RFC822 phrase handling is enabled on outbound email, the fax number appears twice when GFI FaxMaker sends the fax. To resolve this, perform the following from the Notes Administrator:
- From the Configuration tab, select Messaging > Configurations.
- Click Edit Configuration on the server with the GFI FaxMaker mailbox.
- Select the MIME tab > Advanced Tab > Advanced Outbound Message Options tab.
- Set RFC822 Phrase Handling to Do not add phrase.
Priyanka Bhotika
Comments