Overview
This article is intended for the Kerio Connect administrators and agents in order to give them a better understanding of the procedure described in the title. Defining user access policies in Kerio Connect allows you to restrict access to any service for any users. You can allow or deny access to individual protocols from certain IP addresses to individual users.
Step-by-Step Guide
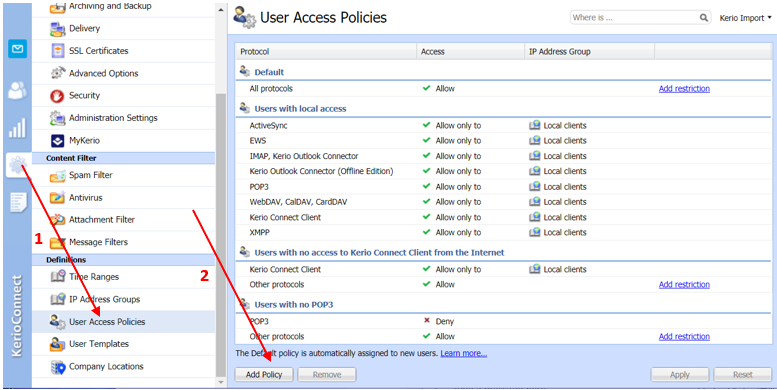
- In the administration interface, go to Configuration (Gear Icon). Under the Definitions section, click User Access Policies.
- Click Add Policy.
- Enter a name for the policy.
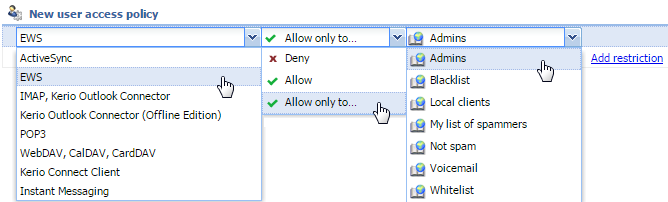
- Click the Add restriction link.
- Select a Protocol from the drop-down menu.
- Select the level of access (Allow/Deny/Allow only to). You can add multiple restrictions.
- Set access for the remaining (unselected) protocols.
- Click Apply.
- To remove a restriction, select it and click Remove.
- To remove a policy, select it and click Remove.

Confirmation
Test if the policy works by logging in as a user and attempt to access the service.
Assigning Policies to Users
- In the administration interface, go to Accounts > Users.
- Double-click a user and go to the Rights tab.
- Select an Access policy from the drop-down list.
- Click OK.
Troubleshooting
If any problem regarding services occurs, consult the Debug log. Right-click the Debug log area, click Messages, and select the appropriate message type (service to be logged):
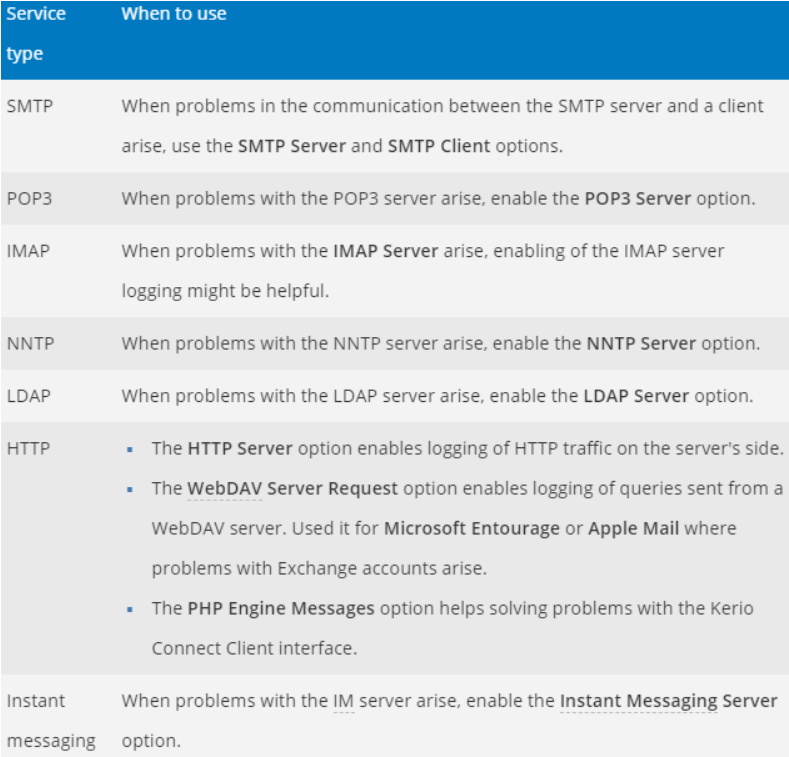
Too many log messages may slow down your server. Once you solve your problem, disable the logging.
Priyanka Bhotika
Comments