Overview
This article provides the steps to set up an IPSec VPN client using the open-source solution, strongSwan.
Note: The authentication method used is pre-shared key-based (PSK).
Environment
Linux Debian 8/9 or Ubuntu 18.04 OS.
Process
- Open Terminal by pressing CTRL+Shift+T (standard shortcut combination for Ubuntu).
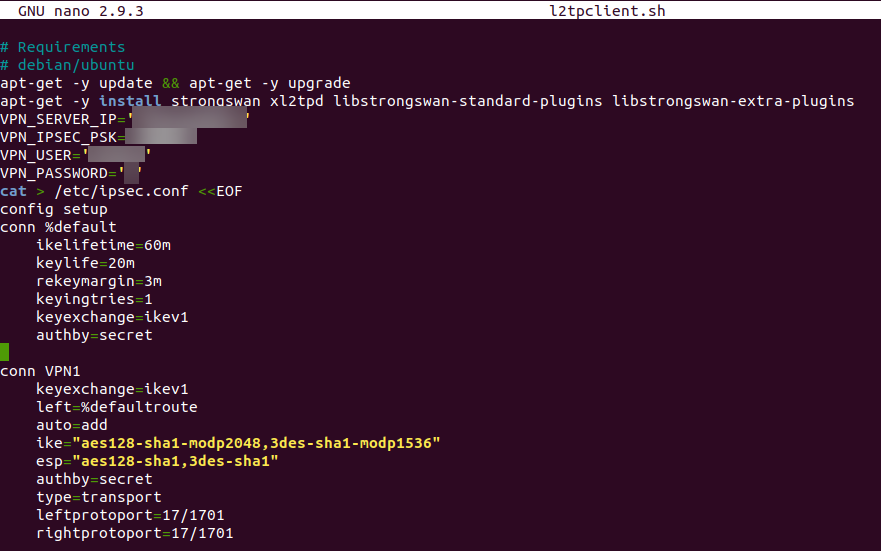
- Create a new file called
l2tpclient.shusing the following command:
touch l2tpclient.sh
- Download the attached text file and copy the script within up to the
l2tpclient.shfile you've created.
- Enter the values for the following variables:
VPN_SERVER_IP- the IP address of the VPN server
VPN_IPSEC_PSK- Preshared Key
VPN_USER- username
VPN_PASSWORD- password
- Make the file executable:
chmod +x l2tpclient.sh
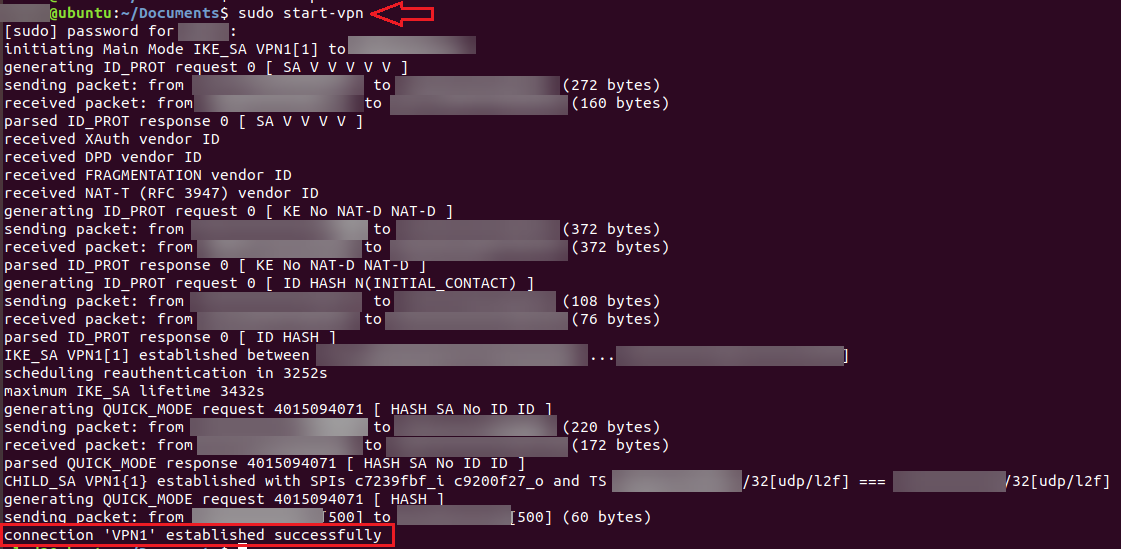
- Run the script with Superuser privileges:
sudo ./l2tpclient.sh
- Once all modules are installed and configuration changes are made, you can start and stop VPN when necessary using the following commands:
sudo start-vpnsudo stop-vpn
- (Optional) If you are using Custom routing, uncomment (remove
#sign) the following line:
#ip route add 10.0.0.0/24 dev ppp0
- (Optional) Modify
ikeandespvariables if you are using custom ciphers.
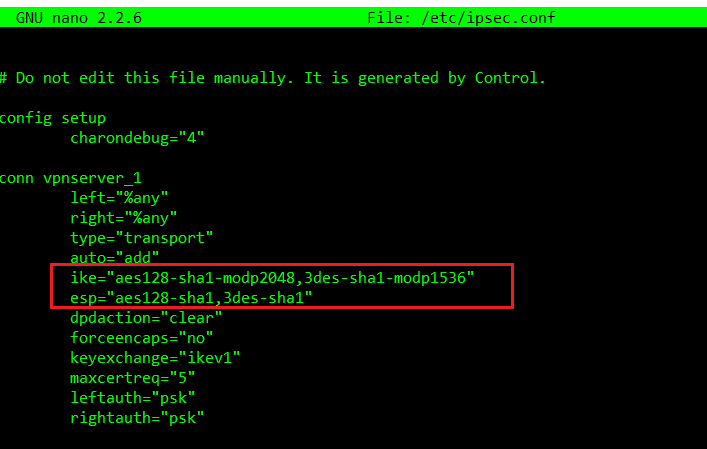
To double-check it, log in to Kerio Control via SSH and open/etc/ipsec.conffile:
nano /etc/ipsec.conf


Confirmation
IPSec VPN connection should be established. Navigate to Kerio Control Webadmin > Status > VPN Clients; the correct information about the client host (Ubuntu/Debian) should be displayed.

Priyanka Bhotika
Comments