Overview
This article provides additional configuration for Kerio Operator's voicemail since it does not need any initial set up. It works automatically once Kerio Operator starts. All users have a forwarding-to-voicemail inbox enabled by default:
- When Unavailable.
- When Busy.
Step By Step Guide
- In the Kerio Operator administration console, go to Configuration > Users. Users can also modify the settings in their Kerio Phone. For additional information, refer to Configuring Ringing Rules.
- The advanced voicemail configuration can be found under Configuration > Voicemail.
Direct access to voicemail inbox and how to configure it
Direct access to users' voicemail enables the receptionist to connect calls directly to the user's voicemail.
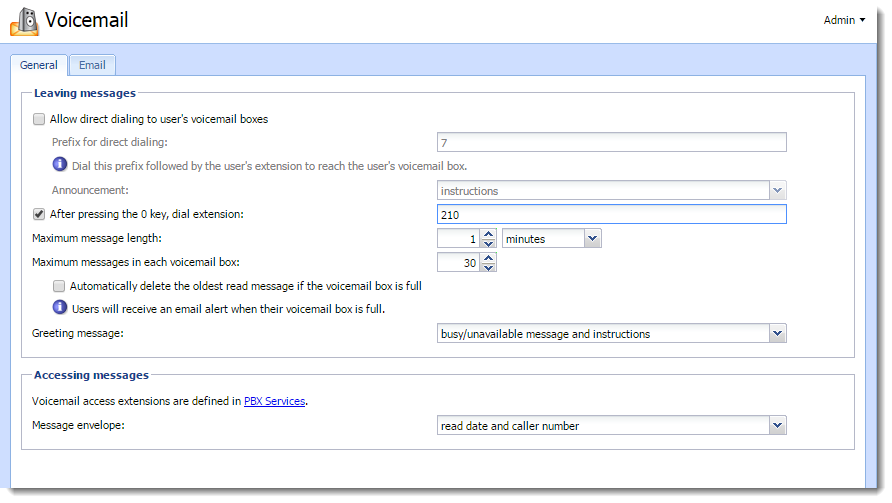
- In the administration interface, go to Configuration > Voicemail > General.
- Check the option Allow direct dialing to user's voicemail boxes.
- Enter a prefix in Prefix for direct dialing.
- (Optional) Set an announcement (greeting message). If a call is redirected to voicemail, the caller hears a recorded message. This message can consist of two parts:
- Instructions inform callers what they should do next, (e.g. Leave a message after the beep).
- The message informs callers that the callee is unavailable (e.g. the phone is switched off) or busy (e.g. the callee speaks with someone else).
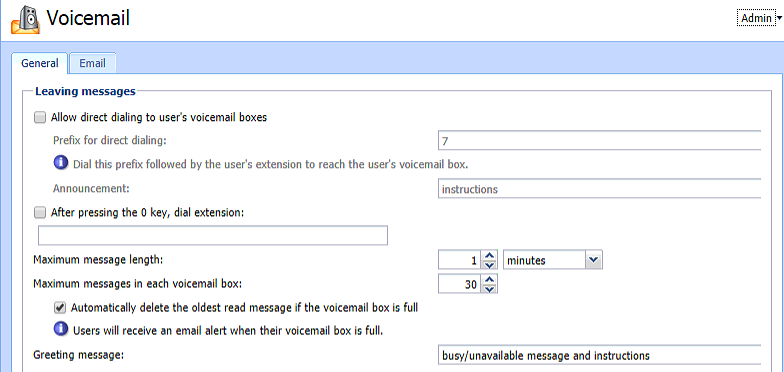
- (Optional) To change the size of users' voicemail boxes, adjust the value in Maximum messages in each voicemail box.
- (Optional) To automatically delete read messages in full voicemail boxes, check the option to Automatically delete the oldest read message if the voicemail box is full.
- Click Apply.
Now the receptionist can dial the extension for direct access followed by the user's extension. The caller will be directed to the voicemail box of the person they are calling.
Enabling caller to escape voicemail by dialing 0
If you want to enable escaping voicemail by dialing 0, you must set an extension where the call is redirected:
- In the administration interface, go to Configuration > Voicemail > General.
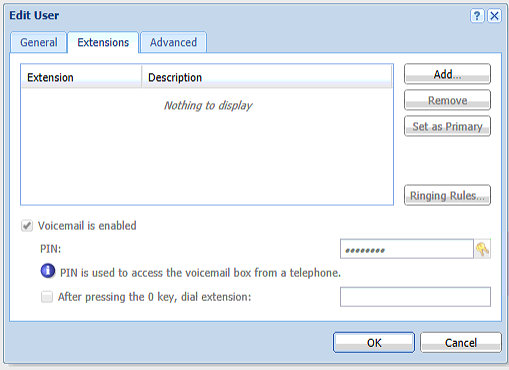
- Check the option After pressing the
0key, dial extension. - Enter an extension.
- Click Apply.
Configuring forwarding of voicemail messages to user’s email inbox
To send voicemail messages to email inboxes of the users, you need to set their email addresses in the administration interface in Users.
Note: If the users' inboxes are unavailable (e.g. the mail server is down), the user accounts are disconnected from voicemail and try to reconnect every 5 minutes. Each attempt to connect is recorded in logs.
My mail server is a different SMTP server
- On your mail server, create a special user which will be used for sending the voicemail messages. You can name them Operator, for example.
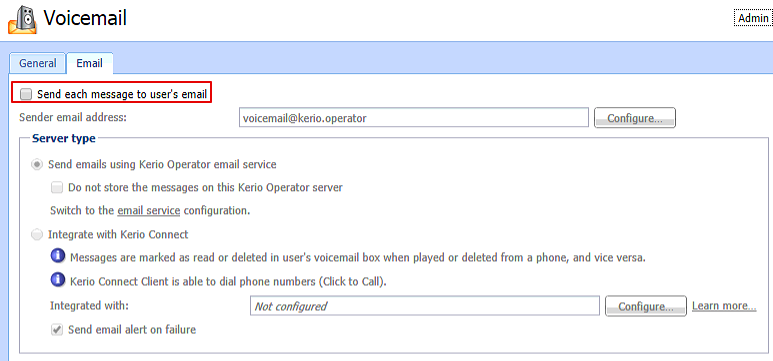
- Go to the administration interface to Configuration > Voicemail > Email and check Send each message to user's email.
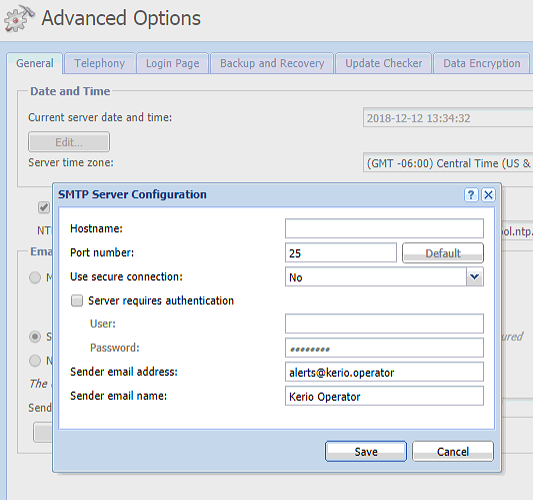
- In the Mail server hostname, enter the SMTP server hostname and click SMTP Configuration.
- Set the port number of the port used by your SMTP server. Usually
25for SMTP and465for SMTPS. - Decide, whether to communicate through a secured connection. If the configuration of your mail server allows it, it is recommended to encrypt the connection to establish more secure communication.
- If your SMTP server requires authentication, check Server requires authentication. Use the username and password for the account previously created.
- Click OK.
- In Voicemail > Email, enter a valid email address in the Sender email address (so that your anti-spam rules accept it). The address should also represent the origin of the message (e.g. operator@website.com).
Configuring the welcome message for callers
- Go to Configuration > Voicemail > Email
- In the Greeting message menu, choose whether the caller will hear the instructions, the message, or both.

Changing the extension and voicemail PIN
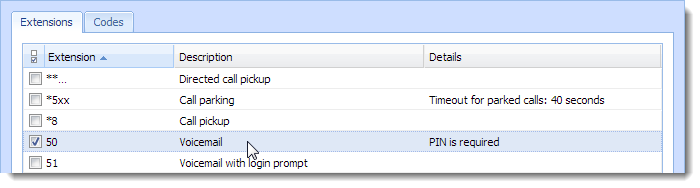
- Users have a special extension number to access their voicemail (by default:
50or51) and PIN.
- To set the user’s PIN, go to Configuration > Users. Choose a user, edit the information under Extensions.
Accessing voicemail
- On your phone: Press the voicemail key or dial the voicemail number and play the message.
- Through Kerio Phone.
Note: For users of Apple iPhone, iPad or Apple Mac OS X: If you cannot play your voicemail messages in Kerio Phone, contact the Kerio Operator administrator.
- By forwarding voicemail to your mailbox.
Removing voicemail data for the selected user
You can remove all local data connected with the particular user.
Local data is:
- Voicemail.
- Custom voicemail greeting message.
Note: Local data means that you cannot use this feature when you use the Kerio Connect integration, voice messages are stored in Kerio Connect in this case.
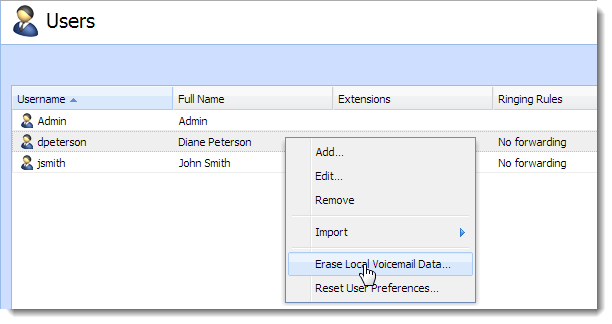
- In the administration interface, go to Configuration > Users.
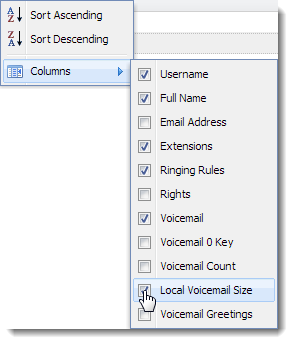
- Right-click the table heading.
- In the context menu, choose Columns > Voicemail and Columns > Local Voicemail Size.
- Right-click the selected user and click Erase Local Voicemail Data.
Confirmation
If you successfully set up the Voicemail, a value of 0B displays in the Local Voicemail Size column.
Related Articles
Priyanka Bhotika
Comments