Overview
This article covers the process to properly secure Kerio Operator. Administrators can take these measures to secure Kerio Operator:
- Restrict communication on the firewall to necessary IP addresses and ports, especially if the PBX runs on the Internet.
- Restrict communication on the integrated firewall in Kerio Operator.
- Create strong SIP passwords.
- Restrict the number of attempts to enter SIP passwords.
- Using special rules, forbid international outgoing calls to countries users do not communicate with
- Restrict international outgoing calls to countries where they rarely call.
- Encrypt calls.
- Encrypt data.
Step-By-Step Guide
Kerio Operator is usually protected by a firewall (in your local network or on the Internet). Certain ports need to be opened (or mapped) on the firewall.
| Service (default port) | Outbound connection | Inbound connection |
|---|---|---|
| SIP (5060) | allow | allow for SIP servers of your provider |
| IMAP (143) | allow if integration with Kerio Connect is enabled and there is a firewall between Kerio Connect and Kerio Operator. | deny |
| LDAP (389) | allow | deny |
| LDAPS (636) | allow | allow if you use mapping from Active Directory or Open Directory and there is a firewall between the directory service and Kerio Operator. |
| HTTP (80) | allow | deny |
| HTTPS (443) | allow | allow if you wish users to be able to connect to Kerio Phone from the Internet. |
| HTTPS (4021) | allow | allow if you wish users to be able to connect to the administration interface from the Internet. |
| STUN/TURN (3478) | allow | allow |
| STUN/TURN (3479) | allow | allow |
Configuring firewall integrated with Kerio Operator
Prepare groups of IP addresses which you wish to allow for individual services (create them in Kerio Operator's administration console):
- Go to Configuration > Definitions > IP Address Groups.
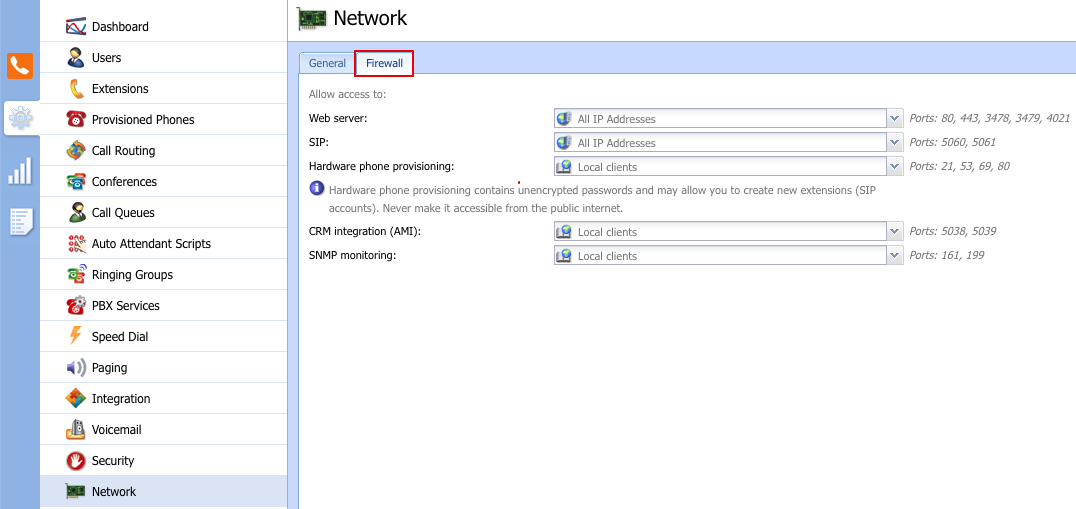
- You can configure the integrated firewall options in the section Configuration > Network > Firewall.
Service Recommendation Web server If you want to restrict connections to Kerio Operator administration and softphone, check this option and choose an IP group with addresses from which access will be allowed. Bear in mind that all the PBX users should be allowed to connect to Kerio Phone at least from their own workstation. SIP It is recommended to restrict the SIP protocol solely to your internal network and external IP addresses of your SIP provider. Phone provisioning For security reasons, it is recommended to restrict automatic phone provisioning solely to your internal network because TFTP sends configuration data as plain text. CRM integration For security reasons, it is recommended to restrict communication solely to your internal network. SNMP monitoring For security reasons, it is recommended to restrict communication solely to your internal network and IP addresses where monitoring servers are running.
Note: If the options are unchecked, no restrictions are set.

Data Encryption
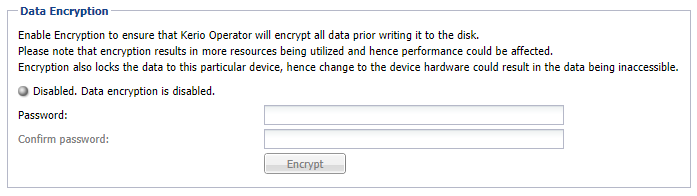
You can enable encryption to ensure that Kerio Operator encrypts recorded calls, voicemail messages, logs, and configuration before writing it to the disk.
IMPORTANT: Encryption is bound to a specific storage device, so if you plan to change the hardware you must first disable encryption. Also, encryption results in more resources being utilized, so performance may be impacted.
Enabling Encryption
- In the Kerio Operator administration interface, go to Configuration > Advanced Options.
- Go to the Data Encryption tab.
- Enter the Password and re-enter to confirm the same.
Note: Once encryption is enabled, the password cannot be changed. Remember this password, as you would require it to decrypt data.
- Click Encrypt and confirm the action.
Disabling Encryption
To decrypt data and disable encryption:
- In the Kerio Operator administration interface, go to Configuration > Advanced Options.
- Go to the Data Encryption tab.
- Click Decrypt.
- Enter the Password set while encrypting and confirm the action.
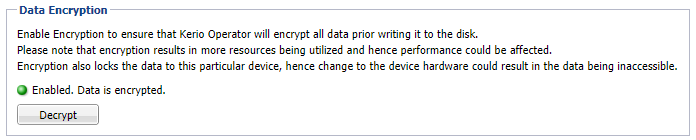
Confirmation
When encrypted, the section Configuration > Advanced Options > Data Encryption displays the message Enabled. Data is Encrypted.
Related articles
Priyanka Bhotika
Comments